8 at Once
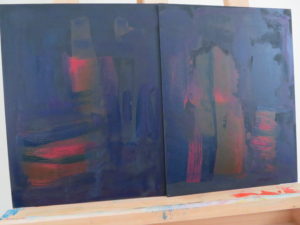
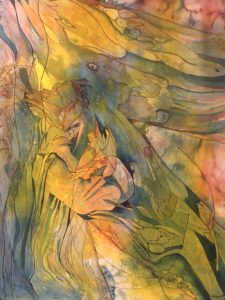
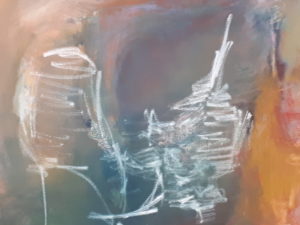
Here is the watercolour paper that I gessoed and taped last week after applying two transparent acrylics, Alizarin and Phthalo Blue. At some point I will have to cut them apart in order to see where each one is heading individually.
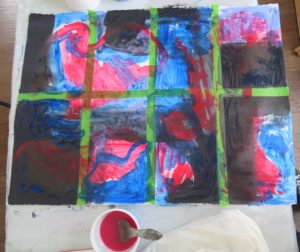
Alizarin and Phthalo Blue over gessoed paper.
Gessoing Watercolour paper for Acrylic
For travelling I am taking half a dozen full sheets of watercolour paper to use with acrylics instead of canvases in order to save room. I remembered that I was supposed to coat the paper with Gesso, and so I used some black and some white, and in some areas the two made a nice grey. I have divided the sheet into eighths with green Frog Tape, and am all set to go on my first eight paintings.
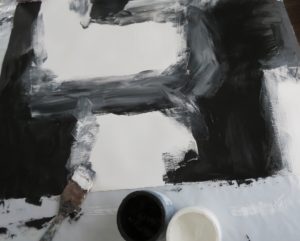
Black & White Gesso on Watercolour Paper.
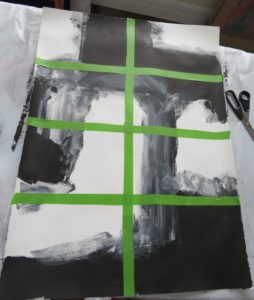
Dividing the sheet into eighths with Frog Tape.
Vaseline Around Rim
It was recommended to me years ago by artist and teacher, Barb McLean in Nova Scotia to apply Vaseline around the rim of acrylic mediums like Matte Medium and Gel to prevent the lids from sticking.
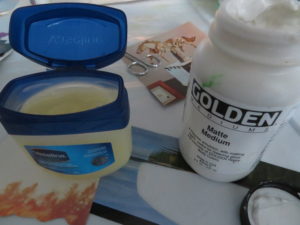
Vaseline to prevent sticky lids.
Tea, Coffee and Ink Please
Dropping FW Sepia Ink into tea or coffee (no cream or sugar!) poured onto wet watercolour paper is fascinating to watch. Here is the same postcard size painting at the start, and then turned upside down a few minutes later.
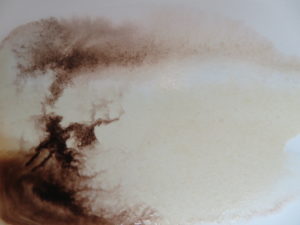
Dropping sepia ink into mostly tea with a line of coffee above. Not much difference in colour between the tea and coffee.
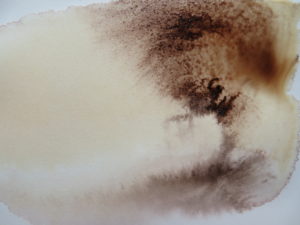
Same piece upside down a few minutes later as ink continued to move.
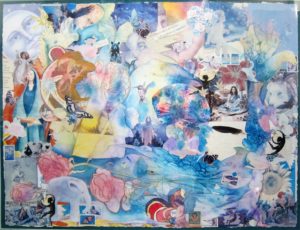
Collage of Bits and Pieces
On a full sheet of watercolour paper I fit together intuitive watercolours, paintings in acrylic and watercolour, drawings, greeting cards outside and inside, stamps, stickers, words, natural objects and perhaps even more into what I hoped would look like a harmonious whole. I intend to donate this old, framed collage to the Halifax Elderdog fundraiser this year.
Collage
Thinning Walnut Oil Paint with Walnut Oil
Here are two close-ups from the new walnut oil painting I just started where you can see the effect of thinning the paint a lot with walnut oil so that it runs. As it dries, it becomes quite mottled in places. I did the painting vertically on the easel but am now working on it horizontally.
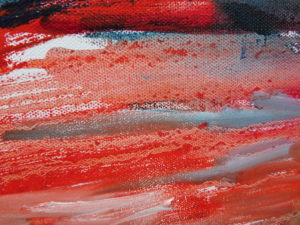
Thinned walnut oil
Thinned walnut oil
Combing with White
Working on two non-objective paintings in the summer of 2017 and not having a clue what to do next, I put white ans white tinted with yellow on the painted canvases, and then scraped with one of my rubber, serrated “combs” from De Serres. “Eagle Totem” was the result of one, and “From My Armchair” which sold that fall at the Urban Gallery was the other.
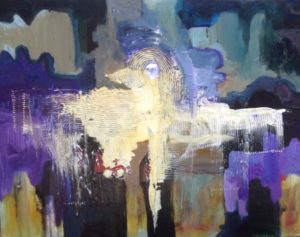
“Eagle Totem”

“From My Armchair”
Practical Tips at Christmas
Murphy’s Oil and Palmolive Dish Soap: great suggestion by Sharon Barfoot for cleaning oil paint off of brushes.
Blue towels from automotive section of Canadian Tire and hardware stores: recommended by Brian Atyeo. Terrific for rubbing fiercely on your canvas or board. Washable (although I have never washed mine).
“How to Sell Your Art Online” by Cory Huff. I am just getting started but like this quote in the book by James Allen: As a man thinketh in his heart, so is he.”
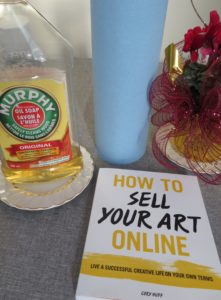
Happy Painting!
From Fajitas to Christmas Cards
The peppers for the fajita recipe came on a Styrofoam tray which I turned into a stamp by cutting off the edges and drawing into. It is easy to make impressions just using both ends of a pencil. Pressing the open end of a bottle down makes circles. These two samples have quite a few layers of acrylic pressed onto watercolour paper which I applied with a sponge and a brush. Gold and silver paints added a Christmas glow. The cards are in the mail. We will taste the Fajitas Christmas Eve.
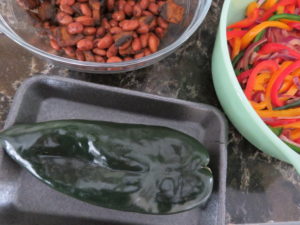
Pepper in Styrofoam tray.
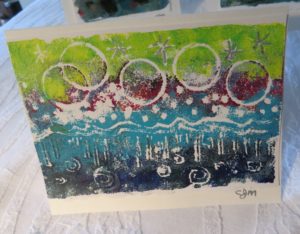
First card from stamp.
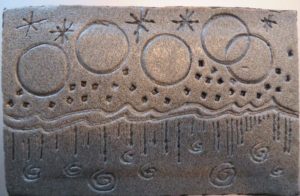
After drawing into Styrofoam to make stamp.
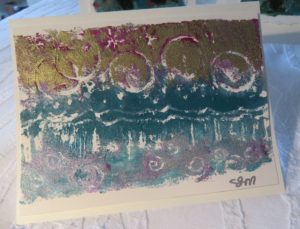
Second card from stamp.
Not a Potato Stamp!
When I cut off the end of a green cabbage to make a salad, I noticed the intricate, floral-like design of the piece of cabbage. I set it aside to try it as a stamp with Green Gold acrylic paint over an intuitive watercolour on paper. Here is the stamp and a few imprints as an example, not yet meant to be a completed painting.
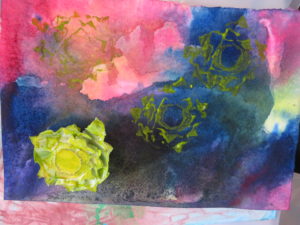
Cabbage Stamp and imprint in acrylic over watercolour.
Transparent Paint on Black Gesso
Here’s a tip I remembered from a Brian Atyeo workshop:
Transparent paints on black Gesso.
use transparent acrylic paints as your undercoat on black Gesso. Then, when you continue to paint with both transparent and opaque colours, they can been seen. Otherwise, the colour just seems to be absorbed by the black.
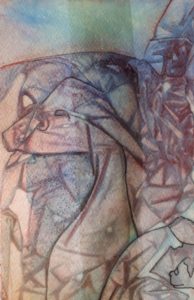
Watercolour over Gesso
Here, in Kathy Longmore’s two intriguing paintings, you can see the unique effect (I call it chalkiness) of painting watercolour over Gesso.
Painting by Kathy Longmore, Haliburton, ON

Example of watercolour over gesso by Kathy.
Palette Knives
Early gift from Jim. A handsome collection of palette knives from Lee Valley. Quite a contrast to my rusty, crusty ones. Just like a piece of pure white watercolour paper, they are intimidating. But just like white paper or canvas, the only thing to do is open a jar of my favourite colour of paint, and dig in. Shall let you know how it goes.

Palette Knives
Netting to create imprint
I keep the mesh bags from garlic, oranges, etc. to imprint the pattern onto paintings or prints.
Final painting in cold wax and oil.
Close up of paint imprinted over netting.
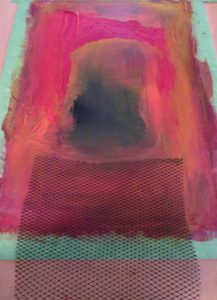
Netting placed on painting.
Shake it Up
Something I try when I feel my painting is going nowhere – randomly stick white tissue paper on it as I have done here. But, I also tear pieces from magazines or use some of my imprinted Japanese papers.
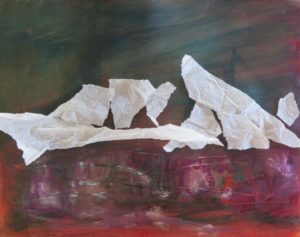
Torn Tissue
Resulting painting over tissue paper.
Printing with Textured Glass
Thanks to my friend, Kathy, I have new pieces of textured glass to use to imprint patterns onto Japanese papers, a technique we learned from Janine Kinch many years ago. Unfortunately, my best examples are still in Nova Scotia but you can see the fine lines that were imprinted on this isolated area of my collage, “Moonlit Waves.”
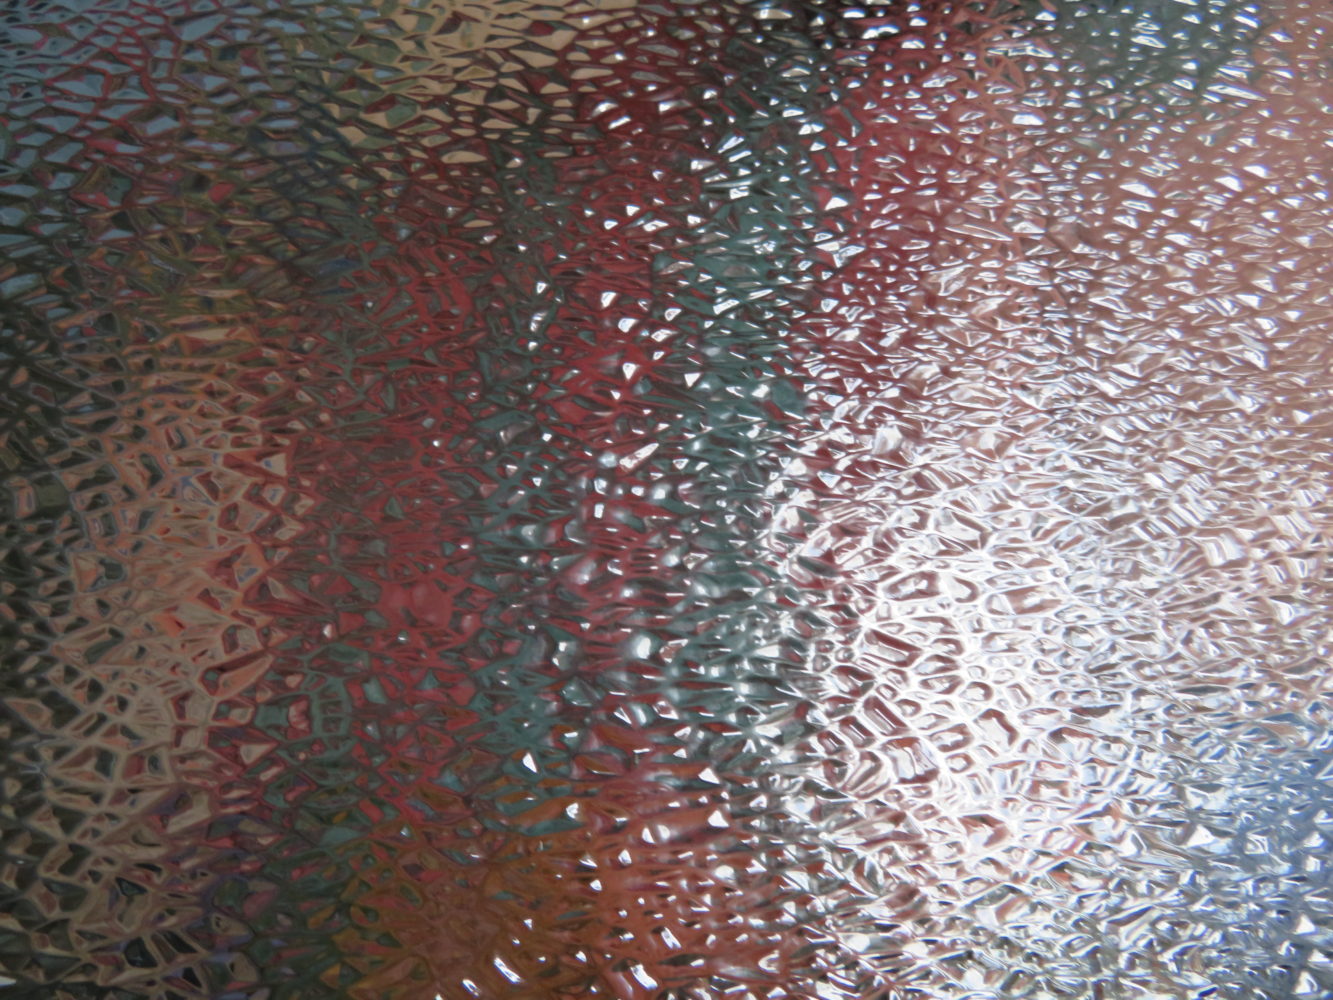
Textured glass for imprinting
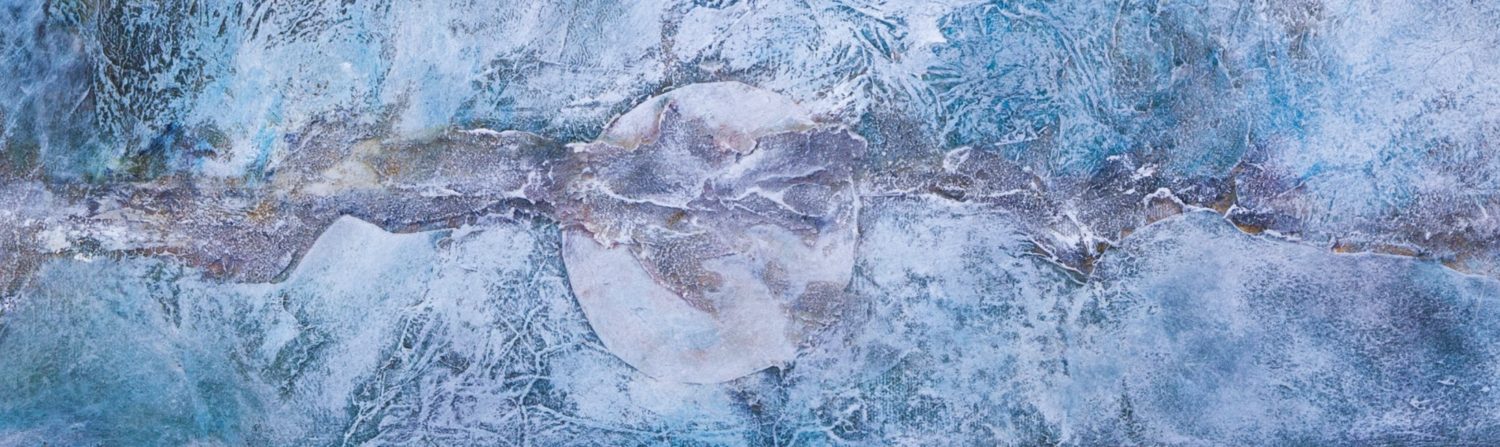
Imprinted papers used in collage
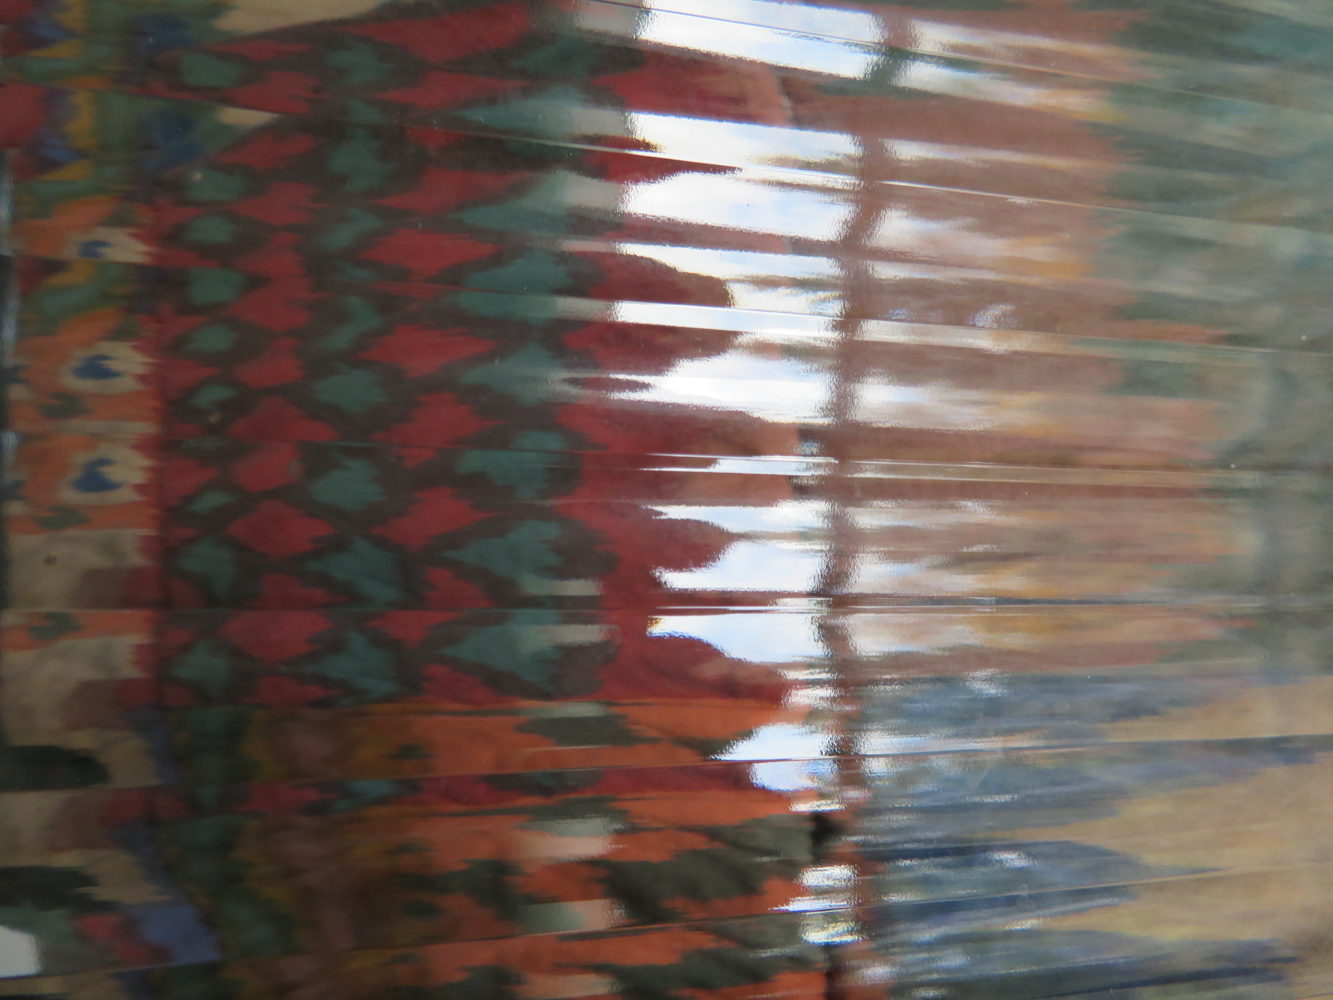
Textured glass
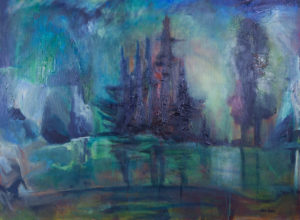
More than One at a Time
So often it has been advised that I work on more than one painting at a time. Here I have four cold wax and oil paintings happening simultaneously. I liked the process a lot and finished one.
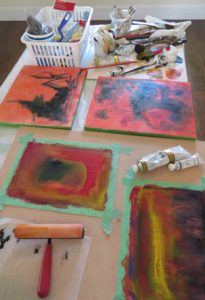
Four on the go.
Alizarin Crimson & Viridian Green
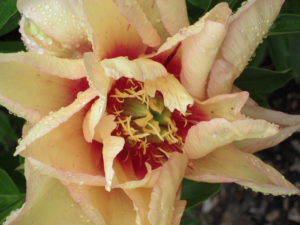
The rhubarb leaves are now patterned in this stunning colour combination, which reminded me of Malcolm Callaway at the Chester Art Centre in Nova Scotia recommending mixing Alizarin Crimson and Viridian Green to make a dark most appropriate for the shady areas amidst leaves.
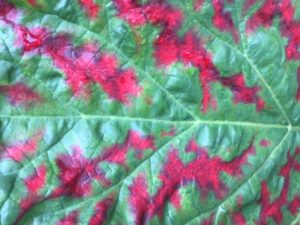
Rhubarb leaf in the Fall.
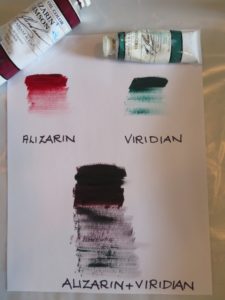
Alizarin and Viridian.
Cut Paper into a Circle
When you cut your watercolour paper into a circle before pouring, you get a 360 degree opportunity to find shapes as seen in “Contemplation” hanging in Helen and Chris’ house and “Moray Transformer” at Wendy’s. In the latter, two layers, one raised by foam core, are joined by copper wire.
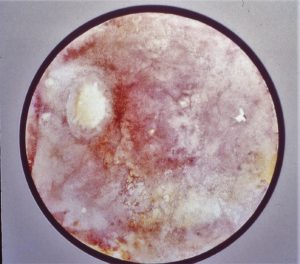
Contemplation

Moray Transformer
Find the Photo Transfer
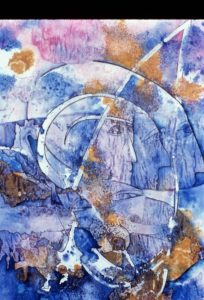
Can you spot the black and white structure in the middle of the acrylic paint?
It is a photo transfer from an old, family print which I photocopied and then
applied gel to the front. Once dried, I removed the paper on the back, leaving
the image in the gel which I then stuck to the canvas.
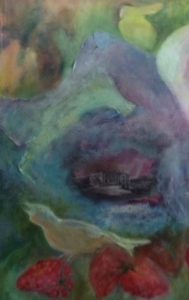
photo transfer
Professional Photographer v.s. Me
What a difference between the photos I take of my artwork with a camera, iPad or phone and the ones taken by a professional art photographer. Dennis Campbell took a great deal of care with lighting and colour while photographing, and also later on his computer. Paintings under glass are particularly challenging because of the reflection. On the website there are also excellent photos by Chris Gosso and Bonnie Fox.
Dennis’ photo.
My photo.
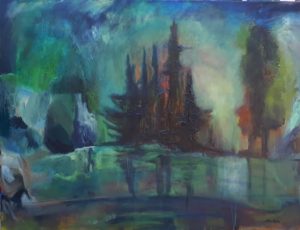
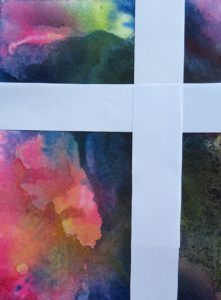
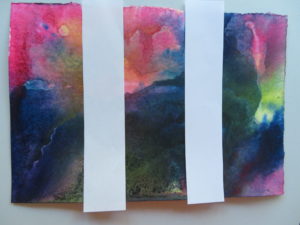
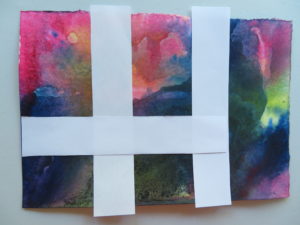
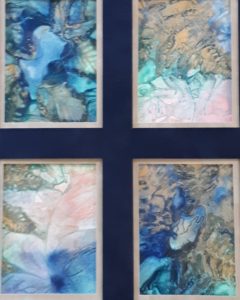
Isolating Areas
The original painting.
You may not like the whole painting but by isolating areas with a mat or strips of white paper, you might find smaller paintings that you love.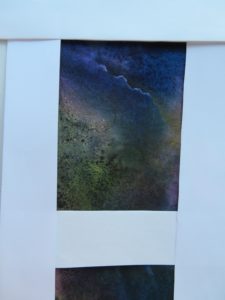
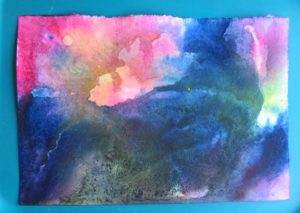
Rubbing Alcohol on Watercolour
Rubbing Alcohol flung onto wet watercolour dives through the paint and causes it to ripple outward in fascinating ways.
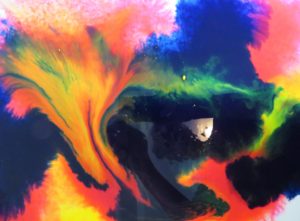
Yellow, red and blue watercolour poured onto wet paper.
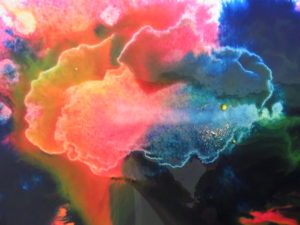
After dropping rubbing alcohol onto the painting.
Gum Arabic
I was told years and years ago that your dried watercolour paintings could have the same intensity that they did when wet if you applied a coat of Gum Arabic. It was only yesterday that I tried it for the first time on these samples. I hope that you can see that the left half of the little heart painting is deeper than the right. And, I painted a stripe in Gum Arabic down the middle of the second one. Quite effective!
Gum Arabic painted down the centre.
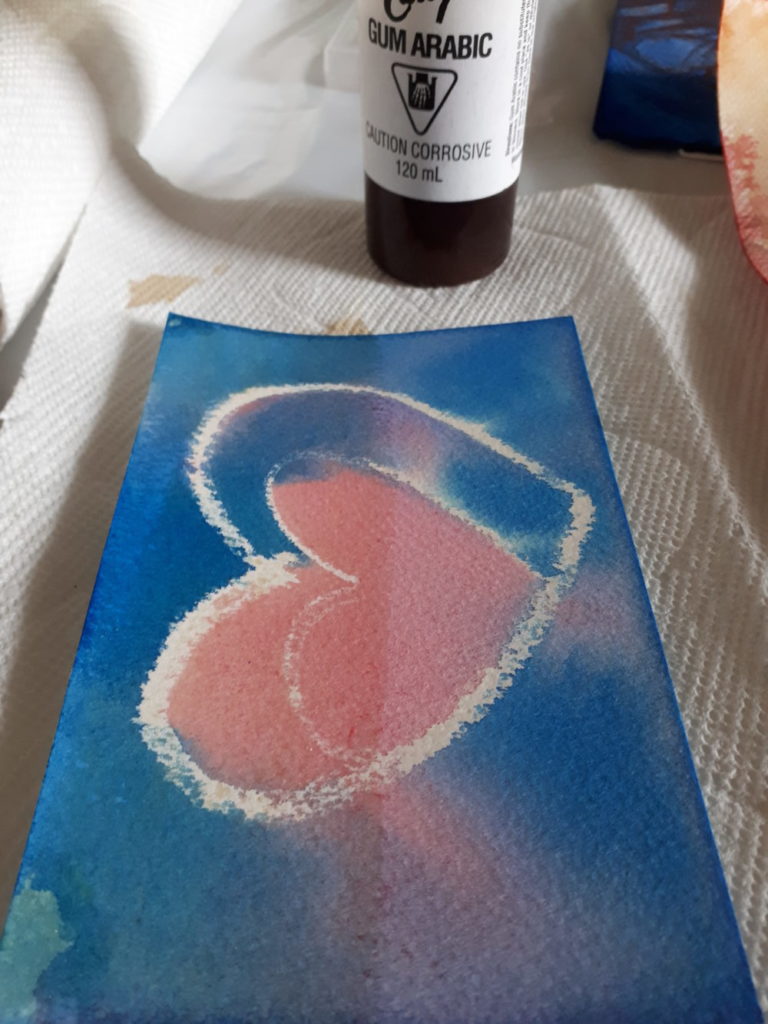
Gum Arabic painted on the left-hand side.
Gelli Plate 2
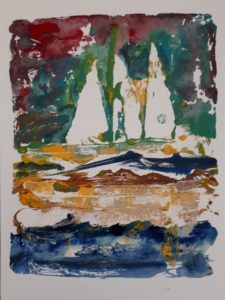
This print was done in a few stages. I painted the plate, printed on the paper, and then I painted on the plate again and printed over the first one. I used a piece of deli paper on top of the print in order to rub the print, taking off some of the excess paint.
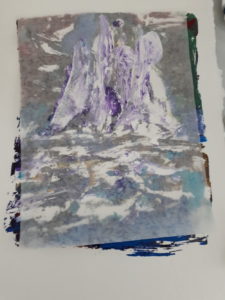
Using deli paper to remove excess paint
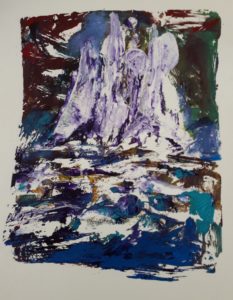
Final print
Gelli Plate Print 1
Making a print using a Gelli Plate and acrylic is simple and effective. You paint, scrape or roll the acrylic onto the plate and then press it onto dry paper (watercolour or Japanese). Using your hands, wooden spoon or bamboo “gizmo,” evenly press down on the plate, and then lift it off of the paper.
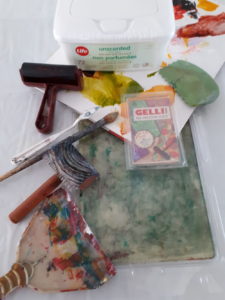
Supplies
Completed print
Here is a sample I did in about ten minutes. The plate cleans off easily with Baby Wipes.
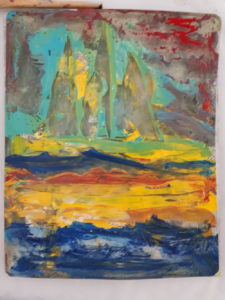
Painting the plate
Taping Sides of Canvases
It seems so obvious now but it was only a few weeks ago that I learned to tape the edges of my canvases with green or blue painters’ tape in order to keep them clean and prevent having to tidy them up afterwards by painting them white, black or grey. It works on canvas and wood. 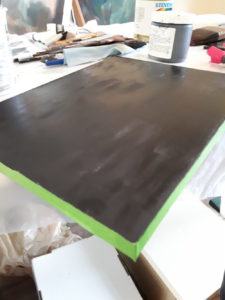
One Foot Scraper
Inspired by watching Gerhard Richter drag enormous scrapers across his canvases (documentary and YouTube), the one foot scraper and six inch brush from the hardware store have been fun to try.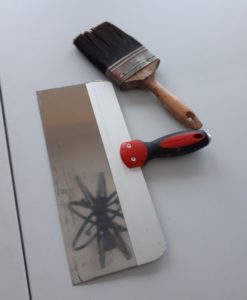
3D Glasses
An interesting discovery, and I do not know how it happened, but wearing 3D glasses allows you to see the lights, mediums and darks in your paintings. 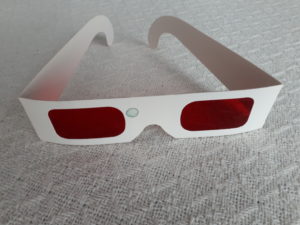
Yupo and Terraskin
Terraskin is about 3/4 mineral powder to 1/4 non-toxic resin combined to make a paper similar to Yupo which is 100% polypropylene. I have used inks, watercolours, thinned acrylics and coloured pencils on both. The Terraskin is slightly more textured than the very slippery Yupo but I enjoy using both. Watercolour sits on top and takes days to dry in puddles which can be effective. Absorbing the paint with a paper towel leaves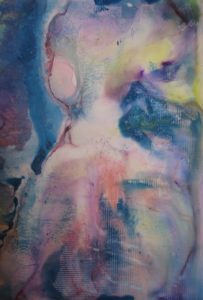 interesting shapes as well. There are many excellent images and comparisons online.
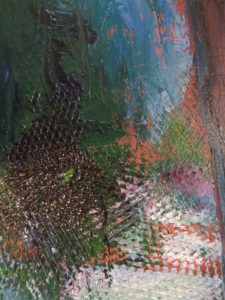
Texture in Acrylic
Although the painting did not turn out, I have always loved this isolated area because of the colours and textures. Crackle paste, thick gel, and a shell pressed into modelling paste were thre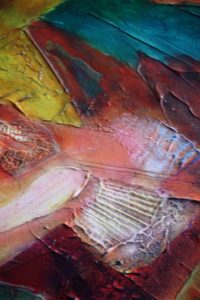 e of the mediums I used
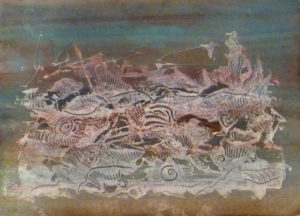
Ferns as Stencils
When I placed a fern over the the dry paint on the plexiglass of the monoprint, “Ferns and Fiddle Heads,” the pre-soaked paper remained white underneath after being pressed onto it. When the poured watercolours and inks were wet, as in, “Tinted with Gold,” the ferns left an impression on the paper when the colours ran underneath.
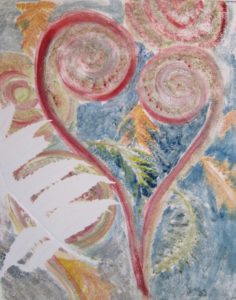
Ferns and Fiddleheads
Stretch Wrap or Waxed Paper
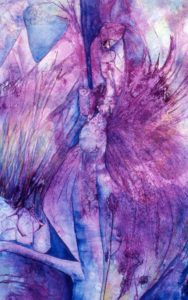
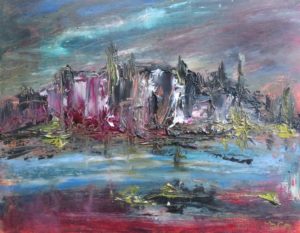
Shamanic Dance
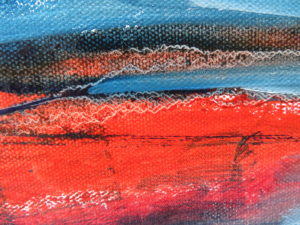
Kneading stretch wrap over poured, wet watercolour will create fine lines as seen in “Shamanic Dance,” whereas
waxed paper creates thicker lines and shapes which you can see in this segment of ‘Spirit of the South Shore.”
Waxed paper needs to be crumpled and then re-opened before pressing into the watercolour. It also creates the mottled colouring which you can see in “Spirit of the South Shore.”
Area of “Spirit of the South Shore”
Effect of Salt on Watercolours
Salt absorbs the watercolour paints and leaves white “sparkles” as you can see in “I have Come to Play, Not to Conquer” on the right.
In “The Protectress” on the left the salt created “blossoms” of various colours in the triangles where there was no stretch wrap.
The more humid the day, the better the salt works.
You can experiment with salts from table to rock.
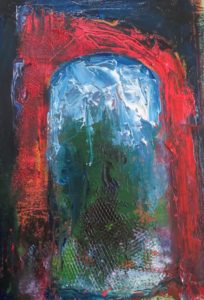
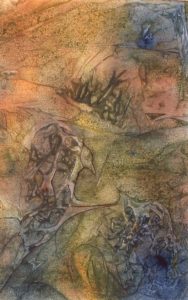
Resists on Dry Watercolour Paper
The birch trees in the painting to the right were created by applying torn strips of masking tape to dry paper before pouring. Randomly flung Rubber Cement made the swirly lines. Once dry, the Rubber Cement i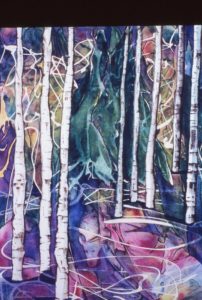 s removed by rolling your finger along it.
Below, in “Unwritten History” I doodled with a white, wax candle on dry paper to make the arcs. That wax is still there. A friend once “mistakenly” dripped melted wax onto her paper before pouring. Those globs, which she could later remove, made very interesting shapes.
Unwritten History
Oil Pastels
I would love to share thoughts on techniques, products, books, concepts … relating to art every Friday, and hope you will join in with your experiences and photos. It is Thursday evening and so I am jumping the gun a little. But, I wanted to mention the Sennelier Oil Pastels, both the shorter ones and the big one in white that I used for the first time the other day over a painting that I had begun in walnut oils. Firstly, I did not really notice a smell which was a bonus. And, secondly, I loved doodling with them on the tip and also swiping across from the side. Sometimes, I dissolved them with oil paint or walnut oil on a cloth. A friend mentioned that the R&W ones are “amazingly soft and luscious to work with.” Here are a few photos of the stages of “Renewal.”
Follow up on mention of The Circles of Moray, Peru
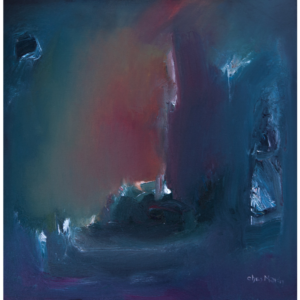
Remembering climbing down the Circles of Moray carrying our painting supplies and bottles of water to paint, and then sitting in a circle with Kathy, Jill, who lead the group, Dolores, Janet , Ann, Barb and many others who became lasting friends, I am including, “Moray Transformer,” which is an intuitive watercolour made into a tiered collage with foam core (great framing by Jack at Studio Six) and threaded with bronze wire. No one knows why the Incans built the Circles of Moray, but they are fascinating ruins. My friend, Wendy, was drawn to the collage, and it is hanging in her apartment.
Cold Wax and Oil Book
Sharon Barfoot (www.sharonbarfoot.com) recommended this book as a reference for Cold Wax and Oil painting:
“Cold Wax Medium: Techniques, Concepts and Conversations” by Rebecca Crowell and Jerry McLaughlin available through Squeegee Press.
Having experimented with a couple of paintings, I am keen to receive my copy. I love the effect but don’t really know what I am doing yet!
I am inspired by Sharon’s painting which is in the book, shown here. 
M. Graham Walnut Oil Paints
Whenever I mention how much I love walnut oil paints, people get confused because they think of the walnut oil that they can add to regular oil paints, and have not seen the tubes of gorgeous colours by M.Graham on the shelves. For me, they work well because I can tolerate the smell and wash the brushes with Sunlight dish soap (and sometimes Murphy’s Oil although I do not like its scent).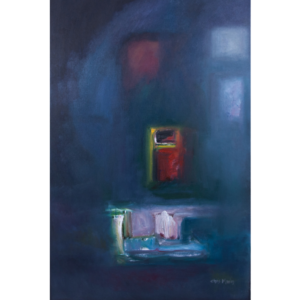

My First Blog Post
After decades of mulling over the idea of website/blog/Facebook/Instagram and not knowing where to start beyond needing good photos of my artwork, it seems surreal to be out there in the social media world in all of these formats.
MarketTap in Toronto did the research and got me going strongly on Facebook before my Urban Gallery show in October and for a few months into the New Year.
Jim, Ian and Sandra from MarketTap eased me into Instagram even when I panicked because I had accidentally “liked” my own post.
Jan Ferrigan at NearBuyArt in Collingwood, her husband, Mark and their two photographers, Bonnie Fox and Dennis Campbell have been exceedingly helpful with hands-on and at-home visits to take photos and go over the details of the website. NearBuyArt also displays my paintings on their own website and hung some of my paintings at the local Home Expo and Creative Space on Hurontario.
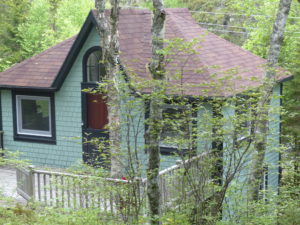
My West Dublin Hansel and Gretel studio.
After years of painting in relative seclusion in my treetops studio in West Dublin, N.S. I made a conscious decision when we moved to Collingwood to make myself and my artwork more present in the community, near and far. The support of the people mentioned and that of family and long-time friends and those on FB and Instagram has made the leap much gentler than expected.
The coaching guidance of Carlayne Gilberton brought this poem by Anais Nin into focus:
 “And the day came when the risk to remain tight in the bud was more painful than the risk it took to blossom.”
13 Comments
Submit a Comment
Art photography by Dennis Campbell, Bonnie Fox. Chris Gosso, and Eric Sutton.
Web design by Be Visible Web Design
Congratulations on your new website, Chris!! I’m so happy to be a part of it all 🙂
Thank you, Sandra. You have been a great help all the way.
Beautiful site! LOVE it 😀
Thank you, Patrice, I appreciate receiving your positive feedback.
The poem by Anais Nin is a lovely reminder allowing growth and change…thanks for sharing!
Fabulous gallery of creations!
Thank you so much, Kathy.
The poem reminds me of another saying that came out of our shared Peru trip, “It is only at the very edge of risk that one finds the energy to transform one’s life.” Remember sitting in a circle in the Circles of Moray? Did you not lead us in a yoga type meditation there before we painted?
Hi Chris, yes I do remember climbing down the circles o Moray and leading a yoga mediation. Fond memories of our trip to Peru! Thanks for sharing! Kathy
Thank you very much, Kathy,
It is similar in its message to one that came out of our shared Peru experience, “It is only at the very edge of risk that one finds the energy to transform one’s life.” Remember sitting in a circle on the lowest level of the Circles of Moray?
Sorry about the repeat. It takes a while for the comment to appear and I did not think it was there.
I have to congratulate you Chris on your new website- I thoroughly enjoyed it and you should be very proud of your inner talent.
Carla
Thank you very much, Carla, your enthusiastic response is much appreciated.
the Murphy’s oil soap is a terrific clean up tip which was very helpful! thanks for sharing!
Congratulations Chris on all your expressive wonderful work. You are continually exploring many mediums .all resulting in creative work. Your blog.. sharing is so informative, inspiring . Thank you .